Colourful hair is a great way to brighten your mood and add something new and exciting to your look. Here are my tips & tricks to achieving a fun yet professional hair colour at home.

I’ve wanted to have purple ombre ever since I saw Jamie Genevieve do it herself and film the process at home. I’ve had red and pink hair in the past and loved it, so I wanted to try out something new. Since I am at home and can’t get to a hairdresser due to everything that’s going on, I thought, “Why not have some fun and try it out for myself?” Since I already have pre-lightened hair, all I had to do was apply colour straight on top. This process is easy, semi-permanent and will not damage your hair.
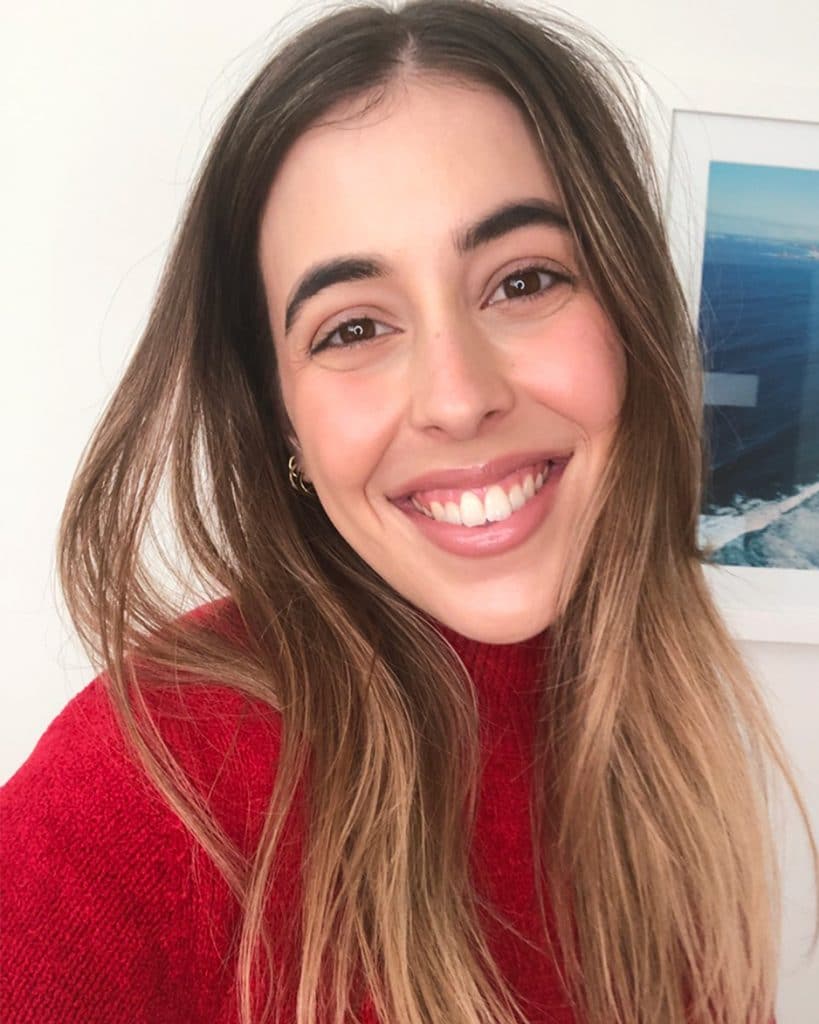
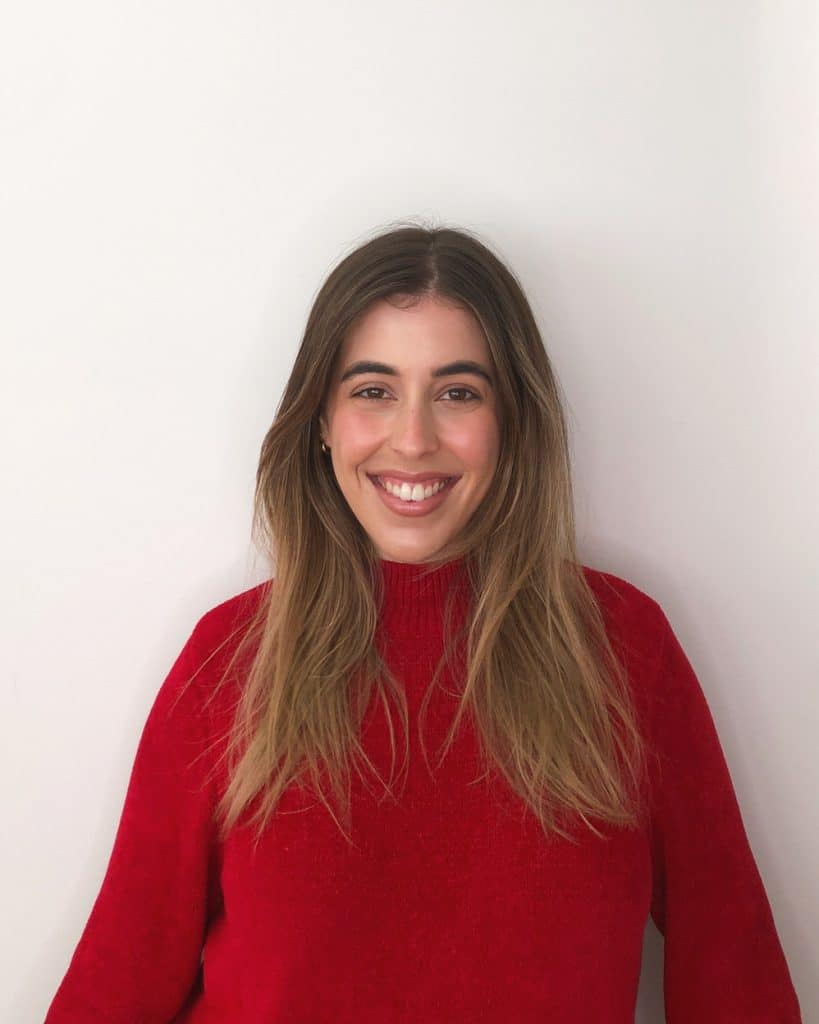
I am super happy with how my hair turned out and would definitely dye my own hair again. In this post, I will explain the products I used and the process I followed to achieve my purple ombre hair. Please keep in mind though that I am not a hairdresser, I’ve just watched heaps of tutorials online and always watch intently as my hairdresser does my own hair. I also do not recommend lightening your hair at home as this will be damaging. Let’s just have fun with some semi-permanent, nondamaging hair colour.

WHAT YOU WILL NEED
Semi-permanent hair dye
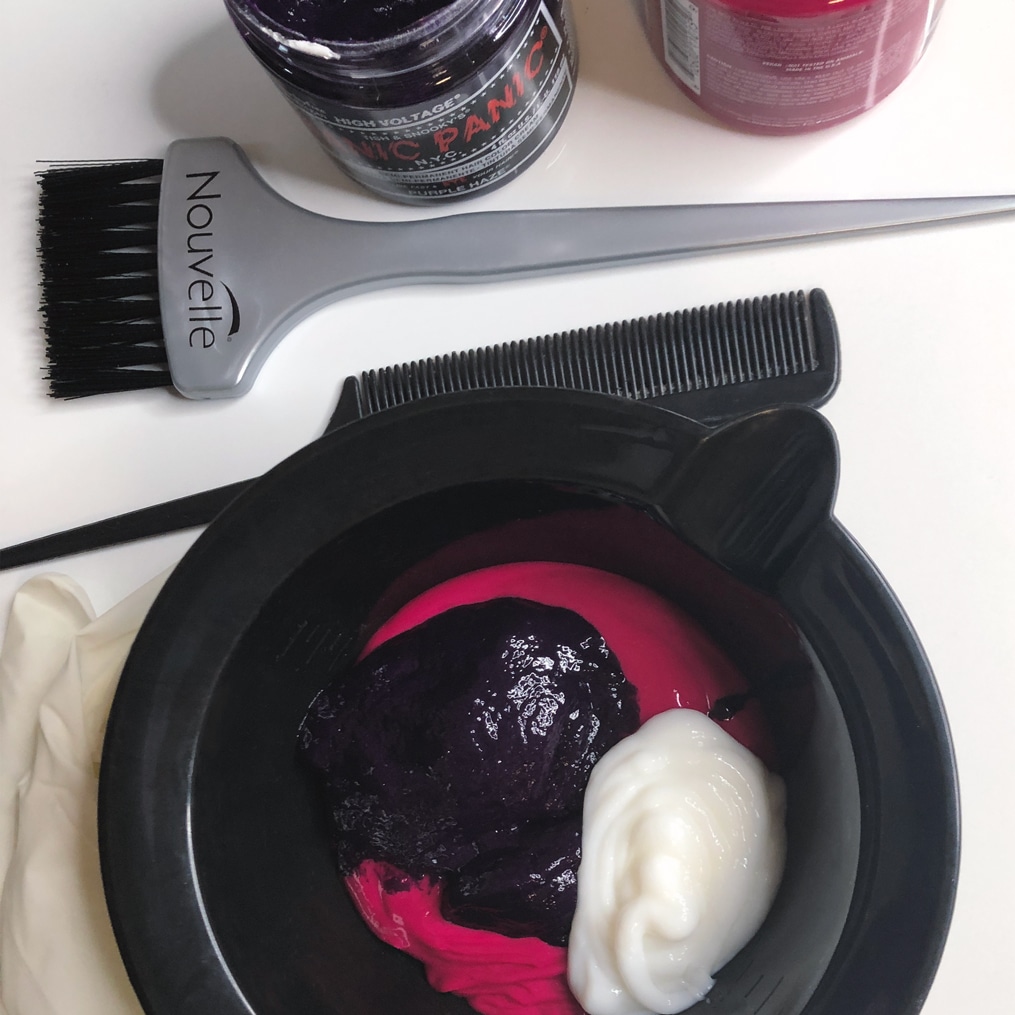
I used Manic Panic hair dye to achieve my bright hair colour. They are an American brand and have been around for a very long time, making themselves a staple in the colourful world of at-home-hair jobs. Their vegan formula is made from vegetable dye and contains conditioning properties to help keep the hair soft. I used the shades Purple Haze and Hot Hot Pink mixed together. I did this because I wanted to create a warm purple with pink undertones. I really recommend Manic Panic as I was really impressed with the colour payoff!
Hair conditioner
Conditioner helps to dilute the intensity of the hair dye. The more hair conditioner you add, the softer the colour will be. I only added a little bit of conditioner as I wanted a more vivid colour.
Hair colouring brush
Affordable (often cost around a few dollars) and helps apply the dye throughout your hair. This brush is especially necessary if you plan on dying your roots.
Mixing bowl
Doesn’t have to be fancy, a plastic container would work here too.
Gloves
I know this are hard to find right now so if you don’t have them you can use your bare hands, but it will take a while to wash out the dye stains.
Fine tooth comb
This tool really helped me get the colour evenly spread and blended throughout my hair.
An old t-shirt
You don’t want to be wearing your normal clothes when dying your own hair because the dye will get everywhere and may not wash out. I wore an old and very fashionable (not) pyjama shirt.
Other helpful tools: cling wrap/plastic cap, hair clips & Vaseline
Hair clips are useful for sectioning the hair and cling wrap/plastic cap can be used at the end to wrap up your hair while it develops. You can use Vaseline around your hair line if you plan on dying your root as this prevents the colour from staining your skin.

THE PROCESS
Please keep in mind this process is for an ombre effect. If you want a full head of colour, I would start applying the colour from the roots and work my way down.
- Put on some old clothes and start sectioning off your hair with clips. I worked my way up the head which meant I started with sections at the base of my head.
- Get your hair colour ready (I used equal parts purple and pink hair dye and added in a generous squeeze of hair conditioner). Ensure the colour is properly mixed. Using your applicator brush, start applying the hair colour to your hair. Because I wanted an ombre effect, I applied the dye to the ends of my hair and blended it up, keeping it away from my dark roots. I used the brush to apply the colour and then worked the product into my hair using my gloved hands. Once I was happy with how high up the colour was, I brushed my hair with my comb to make sure every strand was coated and the colour was blended.
- Once happy with the bottom section, repeat the colouring process, making your way up the head and to the front pieces of your face.
- Since I have highlights framing my face, I brought the purple hair dye up closer to the roots around my face. This ensured that the purple cascaded down my face.
- Once all my desired hair had been coated, I tied my hair into a low tight bun. I wrapped my head in cling wrap (you could use a plastic hair cap) and left my hair to sit for 30 minutes. Check your hair dye packet to see how long they recommend the colour to be left in your hair.
- Once the time is up, have a shower and rinse out the colour. You will know you have rinsed out all the colour once the water starts running clear on the shower floor. I then washed my hair as usual, applied my regular treatments and blow dried my hair. I wouldn’t recommend leaving your hair to air dry at this stage as the colour is very fresh and will run a bit if your hair is dripping (you will stain more clothes).
- Style your hair and voila, you have colourful hair! The colour will fade and soften each time you wash it. Manic Panic hair colour lasts for 15 washes.
THINGS TO NOTE
- The lighter your hair colour, the brighter your new hair colour will be. If you have blonde hair, you will be able to achieve bright vivid colours or even a pastel effect. If your hair is darker, the finish will be more of a tint that reflects in the sun. I have ombre style highlights throughout my hair and that helped the colour show up more. If you are wanting to lighten your hair, please consider getting this done by a hairdresser as peroxides and blench are serious stuff!
- Use an old towel when drying wet hair as the colour will stain. I’m sure the colour will eventually wash out but it’s best not to test the quality of your stain remover on your best white towels.
- Something to note – my hair colour has come off on my pillow and shirts that I have worn throughout the week. This is something I’m not too fussed about as I can wash these items and hopefully get the colour out. Just something to keep in mind during the first few weeks of your new colour.
- Don’t judge your hair until you have styled it. A nice curl and wave will take your hair colour to the next level and make it look a lot more professional.
- Watch & read heaps of tutorials (like this blog post hehe) before dying your own hair at home to maximize your chances of getting a killer new hair style.
I hope you found this blog post helpful. If you have any questions, please leave a comment down below or message me on Instagram. Please tag me if you decide to dye your own hair so I can see how bright and colourful it turns out!
Kara xx
Loved this blog post Kara! I definitely think I will be using all these tips the next time I dye my hair! You’ve done such an amazing job too – it honestly looks like it was done by a hairdresser! Can’t wait to read more posts! xx
Thanks so much Jess! I’m so glad you found this helpful! So keen to see how your hair turns out! Aw thanks so much Jess, it means a lot!! xx